Rain Barrel How-To
Learn how to harvest the rain — right from your roof
Rainfall Harvest Calculator
To estimate how many gallons of water you can collect, enter the dimensions of your roof, including only the section that drains into your barrel. Then, add the amount of rainfall in inches.
Collecting rainwater for your garden is a smart idea, no matter what your motivation. Plants like rainwater, because it's naturally soft, and free of chlorine and other chemicals. If drought is a problem where you live, collecting rainwater is a good way to deal with watering restrictions. If you're on a municipal water system, you stand to save a considerable amount of money. You may also find, as I do, that having a rain barrel is a handy alternative to the garden hose.
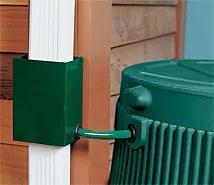
 With this Downspout Diverter, you can send water right to your rain barrel. Automatic overflow control directs water back to downspout when barrel is full.
If you get about 10-inches of rain over the course of the spring and summer, an average, 1,360-square-foot roof would yield 8,160 gallons of rainwater. You have to admit that whether you're in a drought situation or not, it's hard to pass up that much of a free thing.
When you look at the numbers, it's surprising how much water you can collect every time it rains. Just a half inch of rain falling on a 1,000-square-foot roof will yield 300 gallons of water. To get an idea how much water the roof of your own house might yield, use the Rainfall Harvest Calculator, above.
Rain Barrel Supplies List
1. Gutters and a downspout. If you don't already have rain gutters on your house, this one-time investment is the biggest cost you'll face. High-quality gutters can be rather expensive, but even the least-expensive gutter system will suffice. A downspout diverter makes it easy to direct rainwater right into your storage tank.
2. Storage Tank. In arid parts of the country, rainwater cisterns are becoming more and more commonplace. Usually made of either plastic or concrete, they can hold hundreds or even thousands of gallons of water. If you want to start small and keep it simple, consider a wood or plastic rain barrel, which will typically hold from 40 to 80 gallons of water. If you have the space, several barrels can be set up in tandem. .
3. Debris Screen and Lid. Before the water goes into your tank or rain barrel, you'll want to use some kind of debris screen to filter out leaves, pine needles and other debris. If you don't filter out this debris, it will accumulate at the bottom of the tank and may clog up the outflow. A removable wire mesh screen is all you really need, either mounted on top of the rain barrel or attached to the end of your downspout.
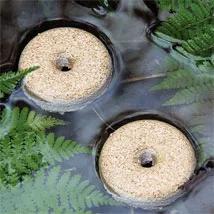
A well-fitting lid is also important to protect children and prevent mosquitoes from breeding in the water. Another option is to use Mosquito Control Rings.
4. Distribution Device. For a rain barrel, you need nothing more than a standard spigot or short length of hose installed near the bottom of the barrel, with an on/off valve. Then you let gravity do the work. You can attach a longer hose to reach your garden, or just use the spigot to fill watering cans.
My own rain barrel is around the back of the house. That's where my deck is, and where most of my container plants are. Because I don't have a water faucet on that side of the house, the rain barrel is a big convenience. I just lift the lid and dip the watering can right in. It fills in a matter of seconds and I'm on my way. If you have a very large reservoir, or want to distribute water some distance away, you might consider investing in a small pump.

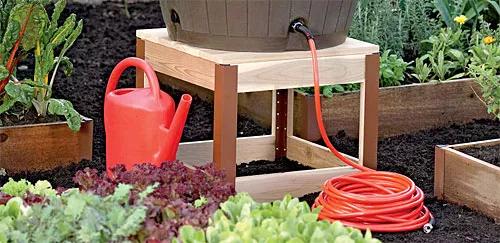
With a Rain Barrel Stand, it's easier to fill watering cans or use gravity to direct water through a hose.
Print this Article:
Get the Dirt
Stay up to date on new articles and advice. Please fill out the information below.

